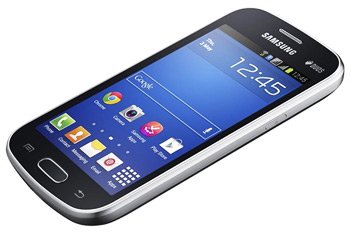
How to Flash Android 4.1.2 DDUAND1 on Galaxy Trend Duos GT-S7392
Galaxy Trend Duos GT-S7392 is face to face with the firmware which is responsible for Android 4.1.2 landing on it. For more on this tool and how to update your phone to this OS, take a look underneath!
The new OS is available for your Galaxy Trend Lite Duos GT-S7392 thanks to DDUAND1 official ROM. India is the country this firmware is headed for. Its launch date is last month and it allows the handset to enjoy plenty of goodies. One of the disadvantages of this firmware is that you can’t use KIES for the upgrade.
The novelties
Your smartphone gets to immerse itself in numerous novelties. One of them is extended Vsync timing. The update arrives with other goodies, too. They’re as follows: pop up play, a fixed frame of 60 fps and triple buffering. The list doesn’t end here, what with Google Now and free style widget also being present.
An update also brings stuff such as the following: automatic adjustment for the size of widgets. Your phone will have group cast, all share and a new keyboard. The last new elements to be on-board are these: touch anticipation, mini apps and sync and connect email updates.
Don’t upgrade a different smartphone with the Android 4.1.2 DDUAND1. The new firmware will damage a model with a different name.
There are two things you should be aware of now. They have to do with a rooted handset getting the upgrade. If yours is such a device, then know this: the new firmware will wipe away its system partition and revoke root access. An upgrade isn’t all that bad: your phone’s data won’t be affected. More than that, its internal and external SD cards will also stick around.
Prerequisites
These are the pre-requisites your Galaxy Trend Duos S7392 must stick to:
- should your handset’s charge levels be low, make sure you help them get up by fully charging its battery;
- activate, on your Galaxy Trend Lite Duos GT-S7392, USB Debugging;
- download the on the notebook;
- download, on the same notebook, Odin v3.09 from here;
- disable the phone’s security solutions;
- disable the security programs on your laptop;
- use Windows as your notebook’s operating system;
- go here and download, on your notebook, USB drivers that only work with your handset;
- the important content featured on your smartphone must be backed up;
- create a full NANDroid backup, following these instructions.
Step by step instructions
When your notebook’s featuring the packages from above, you will be asked to perform an unzipping.
- Both these packages must be extracted; WinRar is one of the methods you can use for this first step. Up next you have to launch, on your laptop, one of the files inside the Odin v3.09: Odin v3.09.exe.
- To continue, restart the handset in Download Mode by making sure these keys are pressed and held together: Home, Power and Volume Down. Volume Up will have to be pressed after a boot message pops up.
- Once in the Download Mode, your phone will need its USB cord to make sure it’s connected to the notebook. Odin will have a sign in blue to indicate the success of the plugging phase.
- The firmware file must be added to AP / PDA when done with the previous plugging sequence. Here’s the part where you need to check these: Auto Reboot and F. Reset Time. Uncheck Re-partition and tap “Start“. After the flashing of the DDUAND1 file begins, around 12 minutes is the time-frame required for this process to last.
- When all of this is over, a message in a green background will come up and the Samsung GT-S7392 will start again. Here’s what the message will say: “Pass”. If all of this has happened, you can move on to our tutorial’s last step. This is how to do it: unplug the phone from the laptop by removing the USB cord.
- [sc name=”banner-jos”]Your device’s Settings option needs to be tapped now. As does its About Phone option. By clicking the latter, your phone will reveal the novelties of the Android 4.1.2 Jelly Bean.
Then you will get to experience the new operating system with its improvements. When neither of them is as great as you’d expected, the NANDroid backup will make sure the old ROM is retrieved. But if you want that back, you will have to give the update up.
For comments and questions we recommend the comment section below!


