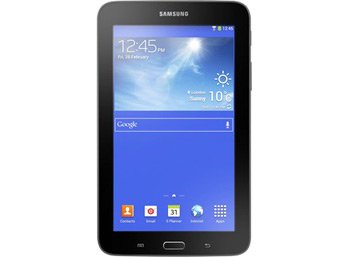
Install Android 4.2.2 XXUBNB2 on Galaxy Tab 3 Lite 3G SM-T111
If you’ve never tried Android 4.2.2 on your Galaxy Tab 3 Lite 3G SM-T111, it’s time to do so via today’s update guide. The procedure is not difficult to perform, as you’ll see below.
XXUBNB2 for Galaxy Tab 3 Lite 3G is the name of recently released firmware that’s used today. This new stock firmware came out this month for India. The tablet we named earlier must be the only gadget you update with our tutorial. If you install the new firmware on another model, the latter’s going to end up bricked.
When moving to a newer OS version, changes will happen. They’ll improve your tablet in many ways. Here’s how: your device will enjoy loads of customization possibilities and low battery bug fixes will be present. Other noteworthy features: a USB debug white-list and the option of long-pressing the WiFi Bluetooth icons in Quick Settings in order to be able to toggle the on/off state. Want more? Here you go: a new Gallery app, superior Bluetooth audio streaming, a new set of download notifications and sounds for wireless charging.
When an update is done on a device that’s rooted, that device’s root access will become useless and its system partition will be erased. This will also happen in the case of your Galaxy Tab 3 Lite SM-T111. But good things will also happen: the tablet’s data and internal / external SD cards won’t be damaged at all!
Prerequisites
Time to get in touch with these pre-requisites:
- after a regular backup’s been created, a full NANDroid one should be created;
- charge the Samsung’s SM-T111 battery until it’s full;
- turn off the software which provides protection for your tablet against viruses and such;
- the security programs installed on your laptop must also be deactivated;
- activate USB Debugging on the tablet;
- USB drivers appropriate for your tablet must be downloaded on your laptop from this place;
- you should make sure Windows is the OS running on your notebook.
Step by step instructions
The requirements should be followed by the steps which ensure the update.
- The one to start this process instructs you to download Odin v3.09 on your notebook. Here is where you should on your laptop. Unzip them with one of these tools: 7Zip, WinRar or WinZip.
- Follow the first step with the one which tells you to launch, on the notebook, the Odin v3.09 and then boot the tablet in Download Mode. This booting requires you to press and simultaneously hold Home, Power and Volume Down and, when a boot screen is displayed, press only Volume up.
- Now you can plug the Galaxy Tab 3 Lite 3G SM-T111 to the laptop. The plugging will begin only if a USB cable has been used; in this case, the USB cable that comes with the tablet.
- The success of the plugging will be signaled by a blue screen appearing in Odin. Should you spot it after a couple of minutes have passed, great. If not, repeat the tutorial once more until you see that blue sign.
- After a connection has been achieved, we recommend this step: add the firmware file to AP / PDA.
- Once you’re done with this, as well, be sure to tick these two boxes only: Auto Reboot and F. Reset Time, respectively. Should you come across a checked Re-partition box, make sure you uncheck it before you begin the new firmware’s installation.
- After that box is not ticked anymore, the flashing of the XXUBNB2 can begin. Activate the process by tapping “Start”, then give the procedure some time to complete. How much? Around 10-15 minutes tops.
- If the waiting’s over, your tablet’s display will pop up with a green background containing this important message: “Pass“.
- [sc name=”banner-jos”]If you see this message in green, do this: unplug the tablet from your notebook after the Galaxy Tab 3 Lite 3G SM-T111 reboots on its own. The unplugging needs only one action to be completed: take the USB cord which united your tablet to your laptop.
You are now fully able to play around with the XXUBNB2. Use the new features that come with the new Android 4.2.2 JB version for your country and, if you like neither of them, feel free to bring the previous ROM back. Remember the NANDroid backup we told you to create?
Go to where you saved it, open the NANDroid backup file and the old ROM will soon be restored. Along with it, the upgrade will soon become revoked.
If you have questions, the comment section below is there to receive them!


